

A quick guide to planning, selecting, and experiencing shipwreck dives while minimizing unnecessary risks.
A shipwreck isn’t a reef with a propeller. It can have sharp metal, snagging lines, enclosed spaces, shifting silt, and historical resonance that you should take into account. This is a wreck-diving guide written for already-certified divers interested in shipwrecks without getting in too deep, too fast, or without caution.
Here you’ll find details on how to select a site, what training is important, which gear truly belongs in your kit, and the most common points of error when beginning with wrecks. This is not about making wreck diving sound scary. It’s about giving you a clearer game plan so you can relax once you leave the surface buoy line.
Shipwrecks have a way of tempting you to swim harder than your skills allow. If you can't currently hold a depth within 1 to 2 meters, deploy a DSMB on the surface and end your dive with a minimum of 700 psi (50 bar) of gas (unless local rules differ) and spend more time in simpler open-water training profiles.
If you're thinking about how to get started with wreck diving, start shallow, on open structures—that means shallow wrecks in the 40-80 ft (12-24 m) range with clear visibility, minimal current, and distinctive features (like a bow, stern, or wheelhouse). Always use a local guide on your first site to ensure you understand current patterns and any particular wreck hazards—they're not always obvious from above the surface.
Structure your first few wreck dives so each one builds on a key concept. Dive One should be an external reconnaissance focused on buoyancy and navigation. Dive Two could be about learning your rig, maybe while attempting some photography. Your third dive can include the briefest, most shallow, well-lit swim-through where there is room enough for two divers to comfortably turn around—the easiest answer for a curious beginner for "how to get started with wreck diving."
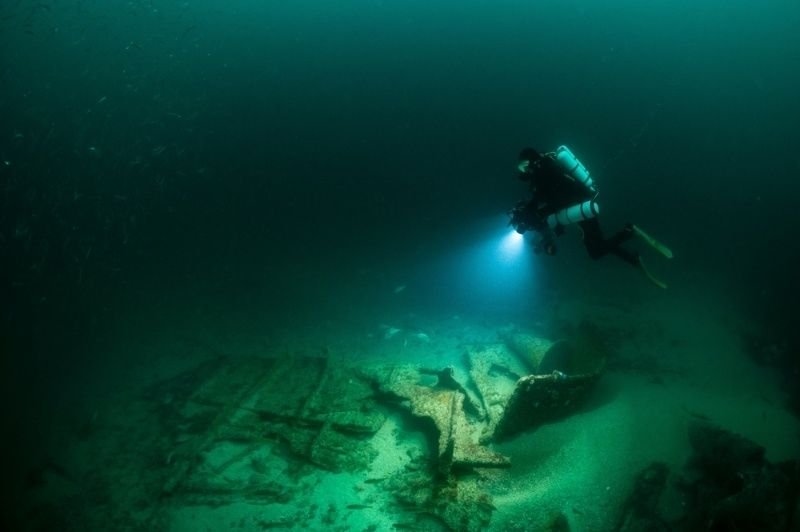
The descent looks the same, for a while anyway. As the distinct lines of a hull resolve beneath you, the scope comes into clear focus: railings, derricks, boilers, and broken bulkheads. This is decidedly not your typical reef dive.
Knowing what to expect on your first wreck dive prepares you to act decisively rather than react poorly. Expect slower swimming, constant buddy checks, and greater awareness of silt and snag hazards. A cutting tool should be in your hand on nearly every wreck dive, as fishing gear commonly settles onto structures.
Your open-water skills aren’t obsolete, but wrecks demand additional planning for overheads, shadows, silt, and entanglement. You can think about the primary wreck diving vs. open-water diving differences like this:
| Factor | Typical reef dive | Shipwreck dive |
|---|---|---|
| Orientation | Natural features and compass headings | Deck levels, broken sections, and mooring lines |
| Main hazard | Current, depth, marine life contact | Entanglement, collapse, silt, overhead areas |
| Best habit | Stay off the bottom | Stay off the wreck and out of unplanned openings |
A more pragmatic way of conceptualizing wreck diving vs. open-water diving differences is to consider task loading. Now, you’ll be mentally juggling depths, currents, underwater photos, orientation, and structural fragility at the same time. Easy initial wreck dives will keep this load manageable.
Many diving incidents are the result of minor errors compounded: following another team into the murk, ignoring gas calculations, and pushing an opening with little idea of the structure beyond. Training dives should emphasize wreck assessment, penetration mapping, underwater propulsive techniques, and hazard recognition.
Mandatory wreck diving gear: DSMB and reel, easily-accessed cutter gloves (for protection against sharp metal, not for clinging), backup mask for advanced dives, two lights when there's limited visibility
A swim-through is an entry-to-exit passage with clearly visible exit daylight and enough clearance that two divers can easily turn and exit without touching the wreck structure. Penetration means intentionally entering an overhead environment where no direct path to the surface is possible from within.
The only right answer for true penetration is specialist training, full guideline use, redundant air sources, and strong, practiced teamwork. Don’t even look at that as a blurred line between swim-throughs and penetration.
The farther you plan on venturing into a wreck, the more crucial your gas management will become. If your gas-planning for a wreck entry relies on “We’ll probably be okay,” you need to rethink it.
The most famous wrecks are not always the most accessible wreck dive sites. A well-maintained 50 ft wreck in clear, calm water offers many valuable lessons. That said, the most famous wreck lists can be useful once filtered against these critical variables: depth, current, visibility, and certification level.
Areas with a high concentration of reliable, guided, and accessible wrecks for new divers include:
These locales typically have permanent moorings, well-known dive operators, and reasonably predictable conditions. Deep, northern, or Pacific wrecks may present extreme temperatures and strong currents, require extensive decompression planning, and come with significant heritage preservation constraints.
The right wreck to dive is one that matches what you are and what’s happening now, not the image you want to take home.
Before you book: Ask the dive operator these key questions.
You should also get details about staff-to-student ratios and what happens if a buddy gets lost. Good dive centers should have definitive, well-rehearsed answers to these questions.
Remember, many wrecks are war monuments and protected archaeological sites. Never remove anything or disturb artifacts—only your photography.
Check This Article: Understanding Decompression Sickness Prevention and Causes
Wreck diving will give up a lot more joy when tempered with patient learning. Begin with the simple external explorations, practice meticulous buoyancy skills, and choose the appropriate dive site for your level, and never consider penetration anything but the next step in an entirely separate training paradigm from open-water diving.
If wreck diving has captured your interest, take to the air—or the depths—with patience and meticulous planning. Most successful, long-term wreck divers started by moving with awareness and not trying to take a single bite more than they could digest.
Do this, and most of your dives will be explorations, not endeavors of daring and peril.
Certainly, if you stick to sites outside the wreck itself and remain within your qualification constraints. The most useful option for novice wreck divers is a shallow dive website with visibility that can enable the guide to see what’s happening. Avoid overhead circumstances or tight spots until you have actually developed confidence and more training.
Most divers certified can look into a shipwreck from the exterior, provided you stay well within your depth restriction. Having a shipwreck specialty rating, nevertheless, provides additional guidance on hazards and navigating the wreck, as well as preserving the wreckage and its history. Entering the wreck is, obviously, a specialty and also needs to be approached with caution and training specific to overhead environment diving.
Stop moving forward, signal your dive pal, and don’t do large kick strokes near the wreck, which could agitate resting sediment and trigger you to lose consciousness. Take action, slowly relocating far from the hull of the wreck without putting yourself into a loss-of-consciousness-inducing predicament. Take into consideration what the result will be before your actions.
No! Most wrecks are archeological sites, battle graves, or various other designated protected historical areas. You could get in trouble, and you could lose out on what appears to be an antiquity. Try it just like any other museum, and see that it is there for archaeological interest.
This content was created by AI